Heavy weights do not need to fall to damage a floor. Repeated rolling, dragging, and careless drops can leave dents, cracked tiles, or compressed carpet. This guide explains how to store weights in a way that protects the floor, equipment, and nearby users.
The Sports & Fitness Industry Association’s 2024 Topline Participation Report shows continued consumer interest in strength training. Meanwhile, IHRSA’s Global Report highlights the growing importance of well-managed fitness facilities. These reports suggest a practical issue: more weights require better storage discipline. A six-kilogram dumbbell may seem harmless. A loaded barbell resting on one small contact point is not.
Fitness equipment specialist and strength coach Matt Wenning has stated, “The most important part of training is being able to train tomorrow.” That principle also applies to storage. A stable rack, rubber flooring, and controlled placement reduce unnecessary impact. Thick rubber tiles can absorb energy, but they cannot correct an overloaded rack or uneven surface.
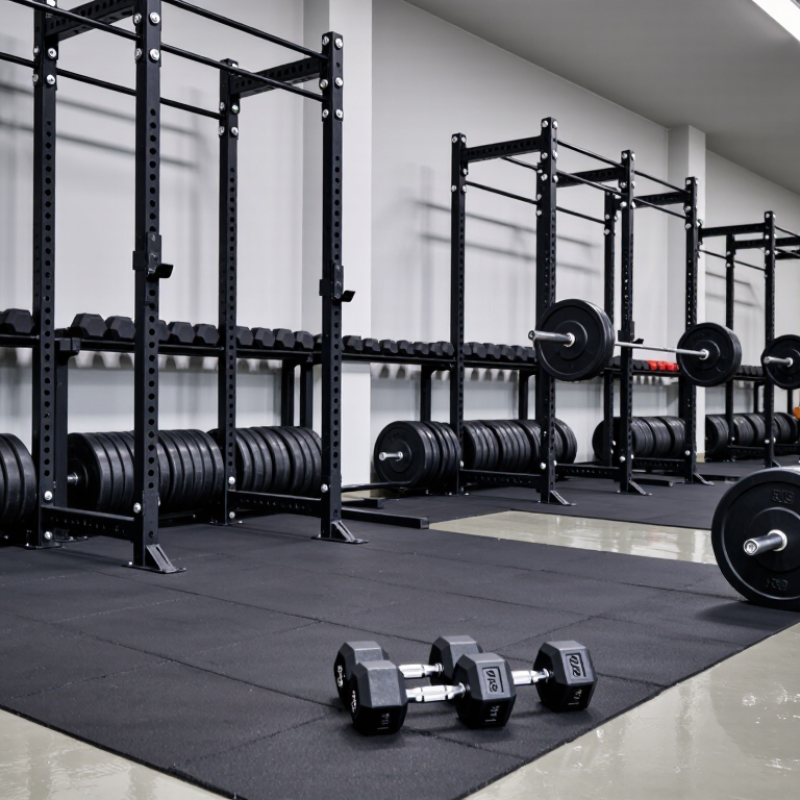
Start with the floor itself. Concrete, vinyl, wood, and laminate respond differently to pressure and impact. Use dense rubber mats beneath racks and lifting zones. Keep plates off bare corners and avoid stacking them against walls. Store heavier plates lower, with handles facing outward. Check for trapped grit beneath the mats. Small stones can behave like sandpaper.
Perfect storage is difficult. I have seen tidy rooms hide damaged flooring underneath thin mats. That is an easy mistake to repeat. Inspect contact points monthly, tighten rack hardware, and replace compressed padding before the floor becomes the warning sign.
Assess Your Floor and Weight Storage Requirements
Before storing weights, assess the floor, not just the available corner. A concrete slab usually handles heavy equipment well, but cracks, moisture, or uneven surfaces still matter. Older timber floors may flex under concentrated loads. Look below, if possible. Joists, supports, and the room’s age can reveal hidden limits.
I once placed adjustable weights near a wall and assumed the location was safe. The floor felt solid, but the rubber mat slowly pressed into a soft surface. That mistake taught me to measure both weight and pressure. Add the total load of plates, bars, racks, and people using the area. Then consider how that load spreads across the floor. A wide, dense mat can reduce point pressure and protect tile, wood, or vinyl from dents and scratches.
Storage requirements should match your training habits. Count the plates you use, measure bar length, and leave enough clearance for lifting and walking. Keep heavy items low, especially in homes with children or narrow rooms. Check that shelving or a rack has a stated load capacity exceeding your planned weight. Do not guess.
Room temperature and humidity deserve attention too. Damp spaces can encourage corrosion, while poor ventilation may damage wooden flooring. If the floor vibrates, slopes, or shows new cracks, pause the setup and seek advice from a qualified building professional. A cautious assessment may feel excessive, but replacing a damaged floor is rarely simple.
How to Store Weights to Protect Your Floor?
Assess Your Floor and Weight Storage Requirements
Typical minimum design live loads vary by building use: about 40 psf for residential rooms, 50 psf for offices, 100 psf for public rooms, 125 psf for light storage, and 250 psf for heavy storage. These values are general reference points, not confirmation that an existing floor can safely support gym weights. Keep loads distributed, avoid concentrated stacks, and consult local building requirements or a structural engineer before installing heavy equipment.
Choose a Stable and Floor-Friendly Storage Location
How to Store Weights to Protect Your Floor?
Choose a Stable and Floor-Friendly Storage Location
A safe storage location starts with the floor, not the equipment. Place weights on a level surface near a load-bearing wall. Avoid balconies, raised platforms, soft flooring, and narrow walkways. The 2024 International Building Code references residential live loads that commonly range from 30 to 40 pounds per square foot. However, stacked weights create concentrated pressure. A floor rated for general use may still suffer dents or movement under one small rack.
Use a dense rubber mat beneath the weights. It can reduce impact, vibration, and scratches, but it cannot correct a weak structure. For wood flooring, the National Wood Flooring Association recommends indoor humidity near 30–50%. Damp corners may cause boards to swell, while dry rooms can increase gaps and cracking. I have seen storage areas look practical, yet become unstable after months of uneven loading. That mistake is easy to repeat.
Tips: Keep heavy plates low. Leave clear space around the rack. Check the floor monthly for dents, moisture, or rocking. The 2023 IHRSA Global Report shows continued growth in strength-training participation, so home equipment storage deserves more planning than many owners expect. If several heavy items share one small area, ask a qualified building professional to review the load. Safety judgments should not rely on appearance alone.
How to Store Weights to Protect Your Floor? - Choose a Stable and Floor-Friendly Storage Location
| Storage Location or Method |
Recommended Weight Range |
Main Floor Risk |
Floor Protection Recommendation |
Stability |
Best Use |
| Floor-Level Weight Rack |
20–150 kg |
Point loading and accidental tipping |
Place on a dense rubber mat with a level, non-slip surface |
High |
Organized storage of dumbbells, kettlebells, and plates |
| Rubberized Weight Tray |
5–50 kg |
Scratches, impact marks, and localized indentation |
Use a tray with a broad base and non-slip rubber feet |
High |
Small home-gym setups and frequently used weights |
| Wall-Mounted Storage |
Up to the system’s rated load |
Wall or floor damage if anchors fail or loads are exceeded |
Fix into suitable structural material and follow the stated load rating |
Medium–High |
Saving floor space in a permanent workout area |
| Wooden Platform with Rubber Surface |
50–250 kg |
Impact transmission and uneven load distribution |
Use a rigid, level platform covered with interlocking rubber tiles |
High |
Barbells, bumper plates, and heavier training equipment |
| Closet or Utility Room Floor |
Up to the floor’s verified capacity |
Concentrated loads and limited ventilation |
Keep weights low, distribute them across a mat, and maintain a dry environment |
Medium |
Infrequently used equipment in a dry storage area |
| Concrete Garage Floor |
50–300+ kg |
Surface chipping, moisture exposure, and corrosion |
Use thick rubber flooring and keep equipment away from standing water |
High |
Heavy weights and dedicated training spaces |
| Carpeted Living Area |
Up to 20 kg per item |
Carpet compression, moisture retention, and instability |
Use a rigid protective board under a rubber mat; avoid damp locations |
Medium–Low |
Light equipment when no dedicated storage room is available |
| Unprotected Hard Flooring |
Not recommended |
Scratches, dents, cracks, and sliding during handling |
Do not place weights directly on wood, laminate, tile, or vinyl flooring |
Low |
Only suitable after adding an appropriate protective surface |
Safety note: Actual allowable loads depend on the floor structure, storage equipment, fasteners, and manufacturer ratings. Keep weights evenly distributed, inspect supports regularly, and leave clear walking space around the storage area.
Install Protective Mats and Level Support Surfaces
Storing weights on a bare floor can create concentrated pressure, scratches, and impact damage. Install a dense, non-slip protective mat beneath the storage area. The mat should extend beyond the rack or weight plates on every side. A few extra inches can catch shifting equipment. Avoid soft household carpet. It compresses unevenly and may trap moisture against the floor.
The support surface must be level before loading any weights. Check it with a spirit level, then remove dust, grit, and small debris underneath. Uneven support can make a rack wobble or transfer force to one corner. Use a firm, stable base rather than loose boards or folded mats. Heavy equipment needs broad contact points. This spreads the load and reduces dents in wood, vinyl, or tile flooring. Follow the equipment’s rated capacity, and never assume a thicker mat fixes an overloaded structure.
Inspect the setup regularly. Look for curled mat edges, crushed areas, moisture, and shifting feet. Tighten hardware when appropriate, but do not force damaged parts back into place. Small problems grow quickly. I would also leave enough clearance to lift weights without striking nearby walls or furniture. A common mistake is placing the rack correctly but storing loose plates against it. That can create side pressure and movement. Recheck the arrangement after a week of use. It may look stable at first, yet daily vibration can reveal weaknesses.
Inspect the Storage Area and Maintain Floor Protection
Before storing weights, inspect the entire storage area carefully.
Look for cracks, loose tiles, damp spots, and uneven surfaces.
A smooth floor can still hide weak sections underneath. Tap suspicious areas and check for movement.
Keep weights away from doors, drains, and narrow walkways. These locations often collect moisture or receive accidental impacts.
Floor protection must match the equipment and the surface.
Use dense rubber mats or interlocking protective panels beneath every weight.
The covering should extend beyond the plates and rack feet.
This extra space catches dropped equipment and spreads pressure.
On wooden floors, check whether the surface flexes under a loaded rack.
On concrete, watch for dust, chips, and small fractures.
Clean the floor before placing mats. Grit can act like sandpaper underneath them.
Inspect the area every week, especially after heavy training sessions.
Lift one mat edge and check for trapped water, crushed material, or shifting seams.
Replace damaged protection promptly.
Do not stack weights against unstable walls. Leave enough clearance for safe handling and cleaning.
I once focused on the mat and missed a cracked tile beneath it. That mistake changed my inspection routine.
I now record floor condition, equipment position, and visible damage with dated notes.
The process is not perfect, but consistent checks reveal problems early.
The storage area should stay dry, stable, and easy to examine.
Conclusion
Storing weights safely starts with assessing both the floor and your equipment. Consider the floor’s material, strength, and condition, as well as the total weight and size of the items you need to store. Choose a stable location away from walkways, moisture, and areas where equipment may be bumped. A level surface helps prevent uneven pressure and reduces the chance of weights rolling or falling.
To understand how to store weights in a way that protects the floor, place durable protective mats beneath the storage area and use level supports to distribute weight evenly. Arrange heavier items lower and lighter items higher, leaving enough space to handle them without dragging or dropping them. Keep weights securely positioned to prevent shifting, scratches, dents, and excessive floor stress. Regularly inspect the mats, supports, floor, and storage arrangement for wear or damage, and replace or adjust anything that no longer provides stable protection.

 Carpe fitness